

Getting Started
This page takes you from an unopened box to your first recorded measurement. Read it once before you go out — two of the steps are easy to get wrong on the water, and both are called out below.
What’s in the box
Section titled “What’s in the box”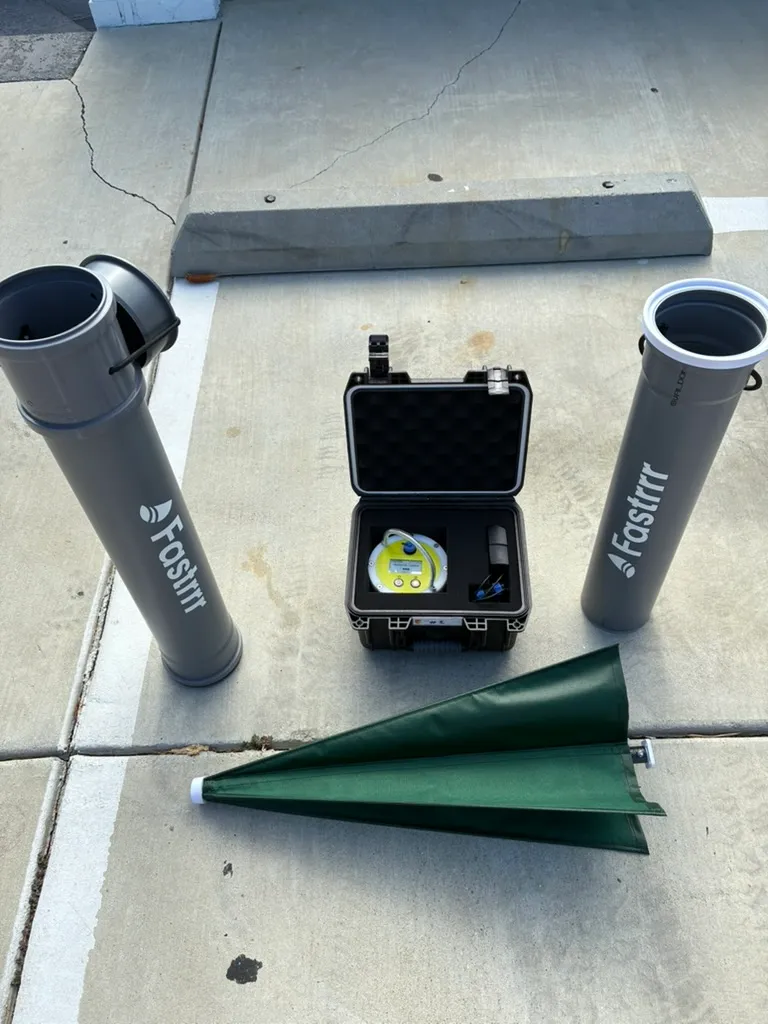
- DrifterBuoy CMU-30 unit
- Two tubes: one is just a holder, the other contains the green drogue
- Mounting screws — these are supplied inside the instrument
- A thin safety cord
- USB charging cable
Fit the drogue
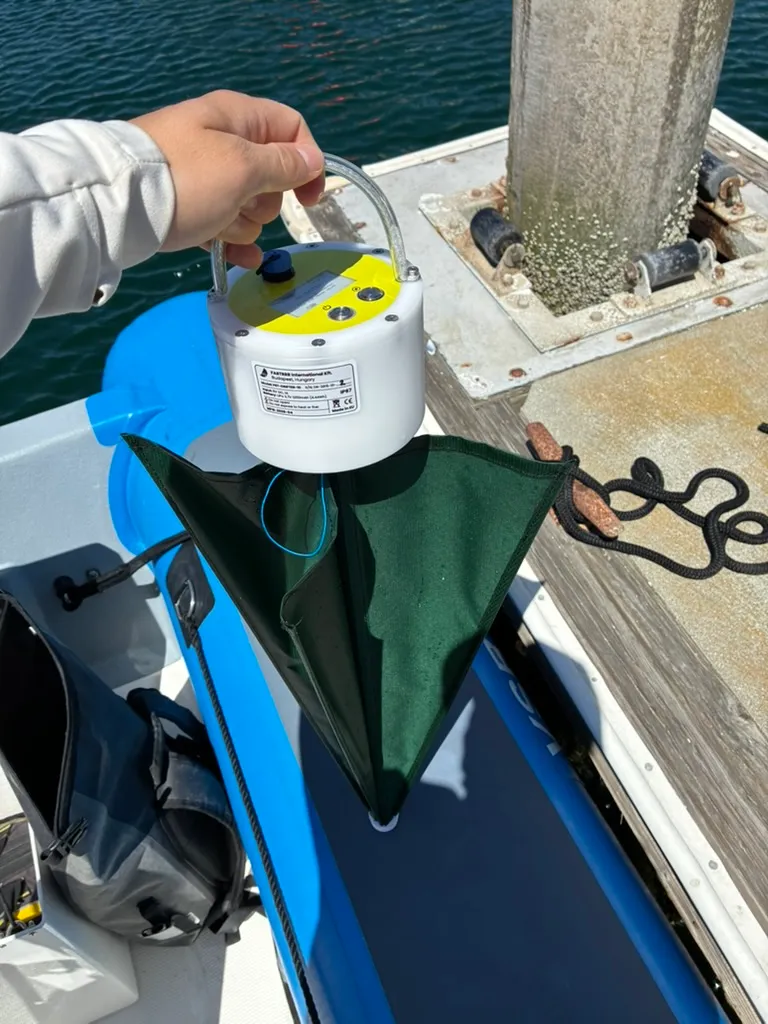
Section titled “Fit the drogue”The green drogue is what makes the buoy follow the water rather than the wind. The buoy will not measure current correctly without it.
- Take the green drogue out of its tube. The plain tube is only a holder — there is nothing to fit from it.
- Take the screws out of the instrument.
- Screw the drogue onto the bottom of the instrument.
Mount the tube on the boat
Section titled “Mount the tube on the boat”The plain tube is the buoy’s holder on board. Fitting it to the boat means the buoy has a fixed home between measurements, instead of rolling around the deck.
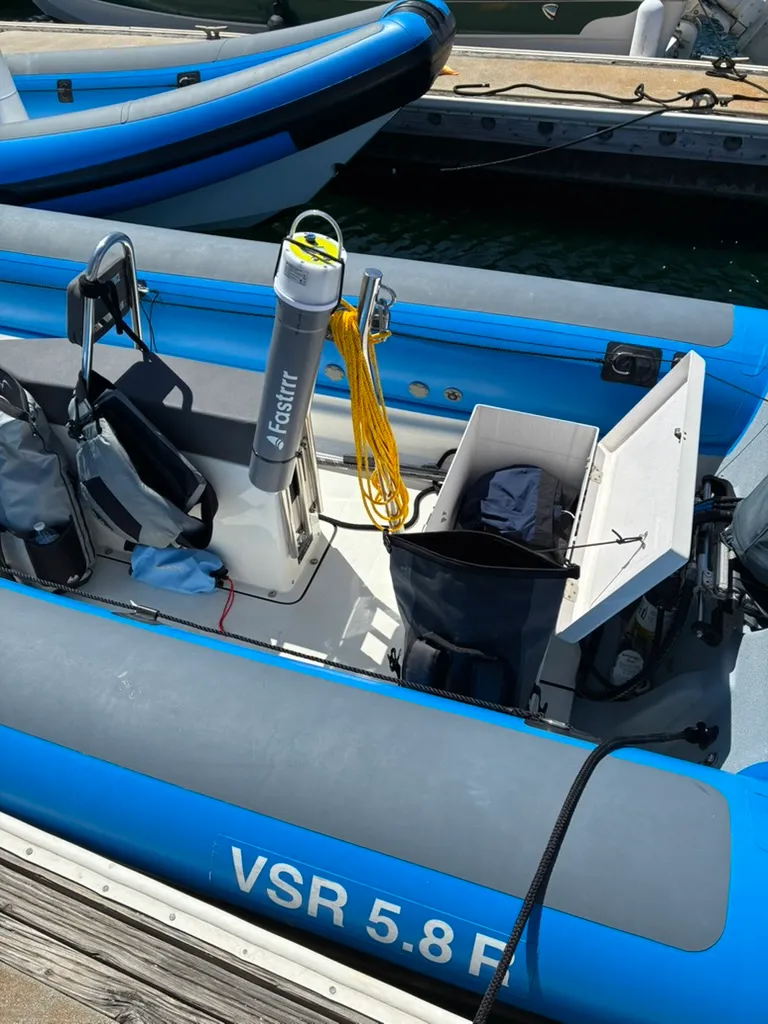
Mount it where you can reach it from the helm, upright, and with the buoy’s handle at the top so you can lift it straight out with one hand. On a RIB the side of the console works well: it is solid, out of the way of the tubes, and close to where you stand.
Keep the retrieval line coiled next to the tube rather than in the tube, so it runs free when you drop the buoy.
Charge the unit
Section titled “Charge the unit”The unit charges over the connector on the housing. In normal use it needs charging roughly every three to four days — how long a charge lasts depends on how much you measure, so let your own usage set the rhythm.
Controls
Section titled “Controls”The housing has two controls and one connector:
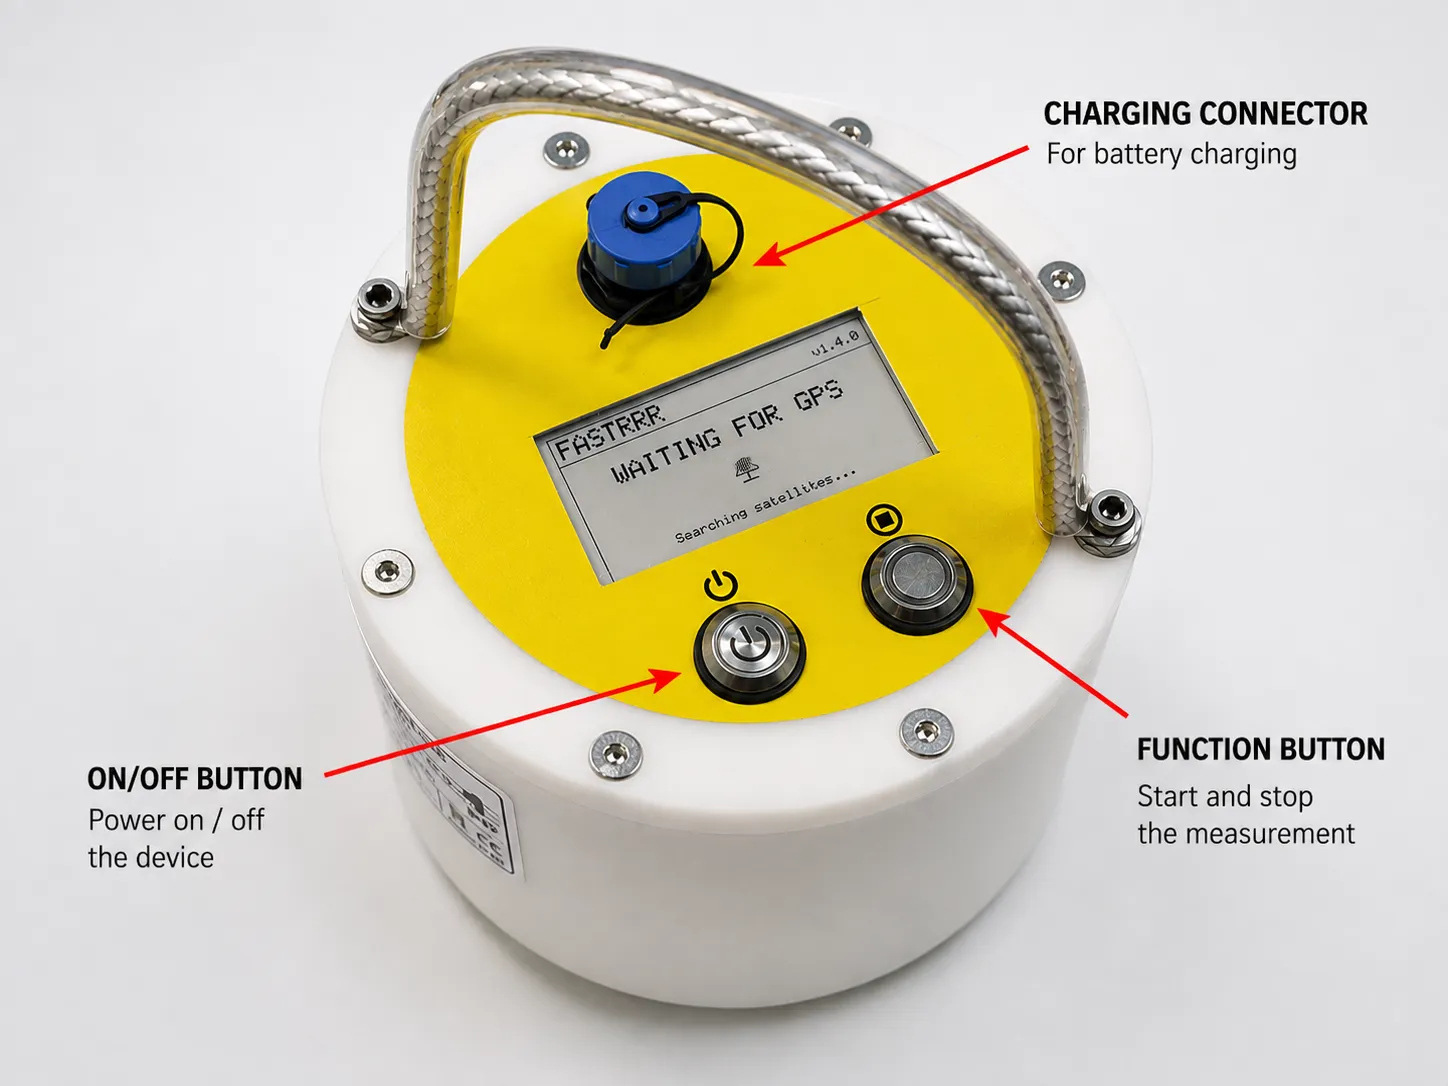
| Control | What it does |
|---|---|
| Power switch | A latching switch. Press it fully in — if it stays down, the unit is on. Press it again to switch off. |
| Button | Starts a measurement, and stops a running one. Hold it rather than tapping it. |
| Connector | Charging. Keep it closed whenever the unit is not on the charger. |
Switch on while still on shore
Section titled “Switch on while still on shore”Connect your phone
Section titled “Connect your phone”The buoy runs its own WiFi network. There is no internet on it — it only serves the buoy’s own pages.
- On your phone, find the WiFi network
FASTRRR-DRIFTERand connect to it. - Enter the password:
sailfastrrr - On most phones a window opens by itself showing the buoy’s page, the way airport WiFi does.
- If it does not, open a browser and go to
192.168.1.1
The WiFi name and password are set per device and can be changed on the SD card, so a buoy configured for your fleet may use different ones.
At most two phones or laptops can be connected to the buoy at a time. If your phone cannot join, check whether two others are already on it.
Run one measurement before you deploy
Section titled “Run one measurement before you deploy”Try a full cycle on shore, watching the page on your phone. You will see the buoy move through four stages:
- Searching for GPS
- Deploy countdown — the grace period to get the buoy into the water
- Measuring
- Measurement finished — the result appears
Once you have seen that sequence on dry land, you will recognise it on the water. The Web Interface page shows each of these screens as it appears on your phone.
Deploy
Section titled “Deploy”Start the measurement, drop the buoy in during the deploy countdown, and let it drift. The measurement stops on its own when the window ends.
After a measurement the buoy is ready for the next one straight away — there is no need to switch it off and on again.
Next steps
Section titled “Next steps”- User Guide — the measurement cycle in detail, reading results, settings and logs
- Troubleshooting
v1.3.0 · 2026-09-29 · 8e84846